If You're in the Market for great junk...You've come to the right Place!

Showing posts with label projects. Show all posts

Tuesday, July 30, 2013

Gonna give THIS a try....

Don't you just love this makeover?? I found this on a great site called 4 the Love of Wood . I think they did a wonderful job. Since I saw this , I have been on the lookout for a similar piece. I FINALLY FOUND ONE!! Can't wait to give it a try.
Will keep you posted!
What are you working on??

Saturday, December 15, 2012

A Rusty Wreath.....

Hello friends!!
I  was super excited about this "wreath" I made today!
I spotted this old farm piece in a antique shop this summer.
Loved the patina and knew it could be something cool.
Today I finally got inspired and made it into a wreath.
Couldn't have been an easier project:
Step 1: Buy super cool rusty piece even though it will sit in the garage for 6 months
Step 2: Head out to garage while you are already late getting to your shop
to gather items you need for customers that day. Spy rusty piece sitting there.
Step 3: Finally get in the car to leave for shop when INSPIRATION STRIKES!
Step 4: Get back out of the car and grab rusty piece!
Step 5: LEAVE FOR THE SHOP!!
Step 6: Get to the shop, unload rusty piece, push everything on the counter that WAS your priority for the day to the side so you can have room to create!
Step 7: Grab ribbon and greenery and put on rusty piece even though you haven't finished turning on all your lights, flipping your open sign, or unlocking doors.
Step 8: Take photos and begin the social networking blitz!
Step 9: See if you have any "likes!!!" (you gotta look right??!!) wink wink!
Step 10: Finish opening your shop
It's that easy!! Proof positive that not all Christmas wreaths need to be green pine...
they can be "green" in other ways!!!


Sunday, May 13, 2012

Love Seat Project Revealed!!!!!

I. Love. It!!!
I thought I had some idea  had no idea what so ever  on how to do this.
I sweet talked Mr. OTM into helping me out.
THANK GOODNESS!
This really was a two man job simply because one needed to pull while the other stapled.
Other than that~ it went pretty easy!

Sometimes projects tend to take on a life of their own.
They almost speak to you to tell you what to do.

In this case mine said "Hey Beth~ I think that old grain sack you've been hoarding for the "perfect" project
would look great on me! "
She was sooooo soooo right!

While I was delving into my stack of favorites , I dug out this burlap coffee sack and re-did the top of this coffee table!
Huh....coffee sack on a coffee table!
That one REALLY spoke to me.
Wonder if anyone will get it?

Anyway, I love how they look together! Maybe the lucky buyer will think the same thing.
I hate to break um up.
They look so cute and make a great couple. 

This was not a difficult project either.
Paint
Sand
Distress
Cut bag
Glue bag
Take photo

Remember BEFORE????

Here's DURING.......

And finally AFTER !!!!

I didn't plan on this being the star of the show but that's what it turned out to be.
This will be making it's way to the Lucketts Spring Market next weekend!
I am so excited.
Sure hope I can run with the big dogs there!
So much talent in one place.
It's going to be great!

Friday, May 11, 2012

Love Seat Progress!

I have to admit...these are just TEASER PHOTOS!!!
Yep...you can see the burlap in the background....

and I gotta tell ya..........
I AM LOVING IT!
{especially for not having a CLUE what I was doing}
Mr.OTM helped me out big time!

It's not done yet though.
See this antique grain sack??
Wellllll just wait til you see where it's going!

While I was sitting there working on it,
I got the urge to take some pretty pictures like all the big time pictures takers do that you see on Pinterest!
I had these tallow berries and  thought "Hey..that would be totally Pinterest material!"
{feel free to PIN away!  heehee...seriously.....}
And so I once again try my hand at serious photography.....
ON MANUAL SETTING!
I know right?
It's gettin crazy up in here!

I still don't have a clue what I'm doing,
But I thought they looked nice enough.

This little cracklie tray is a make-over too.
Underneath that piece of antique burlap  is a multi-colored
rooster  extravaganza with a bright sunshine scene painted all over the place.
Ick.
This make-over took 5 minutes. I cut the burlap and glued it on the tray.
Done.
Love!
Sooo back to the Love Seat. I will be finishing her up tomorrow and CANNOT wait to see her
all made-over.
I have a feeling you are gonna like it!
Stay tuned!
Linking this post to Air Your Laundry Party over at Freckled Laundry!

Tuesday, March 6, 2012

Quick and Easy Chair seat transformation

Hello Friends!

Thought I'd share with you a super easy and super quick transformation I did recently for a client....(hi Amanda!)

We are in the process of redesigning her screened in porch and one of the things that just needed an update were the chair seats to her table set.She already had purchased these awesome old burlap sacks from the shop....
and all that needed done was some quick cutting and stapling!


This is what we needed to update. Now because the porch is screened in, the elements can still make their way inside. Because of this I chose to leave the old covering (watermelon plastic tablecloth) on because of the water resistant surface. Since the jute bags are a natual fiber , I liked knowing that the old covering was still on protecting the padding from getting wet and mildew-ie (not sure if that's a word).


The transformation is fantastic and gives it a completely updated look!

Two burlap sacks were used in the project, scissors and a heavy duty staple gun!

If you've been wanting to make a little change without spending a whole lotta dough..this could be the one for you!

Have a great day!


Saturday, October 29, 2011

Metal tree Transformation!

Good Morning Friends!


Here's an idea that I came up with that I am pretty excited about.....


Are you ready for this?I was given two of these standard white pre-lit metal Christmas trees....
I took it out of the box and easily assembled it and let the branches fall and then "fluffed" them into place... I made sure I plugged it in to see if all the lights were working.....


I tore a GAZILLION of these. Most of what I used were old vintage flour sacks that had stains or holes. Each strip is about 4- 5 inches long. You can use muslin, an old sheet, vintage curtains, whatever floats your boat.
After you get all these together you just start tying them onto the metal branches.....


and after a million hours you arrive at

THIS!


I am in LOVE with how it looks.


Ages ago I used to tie rag strips around a tomato cage frame and made trees out of those.


Still a great idea~ they just take forever to get done.


One day while I was at the shop I was moving these trees around wondering how I would be able to use them for decorating INSIDE.That's when I decided to give this look a try and see how it turned out.


It does take some time to get done but the project itself is easy and the results are


awesome!


So far it's been pretty popular at the shop....


It's our first Christmas decoration that we have out (the Christmas chaos starts next week!)


We plan on doing the 6 foot tree next.....


to use in a Shabby winter wonderland display!


Every once in a while the stars align and a great idea is born!


(either that or my vitamin must have kicked in that day...lol!!)


I was excited to share this with you!


Let me know what you think!


I am linking this to


Air Your Laundry over at Freckled Laundry.


Have a great day!!


Monday, May 30, 2011

PROJECT: CHAIRS!! YOU DECIDE WHAT I SHOULD DO!!

BELIEVE IN YOURSELF.....

TRUST YOUR INSTINCTS.......

GO WITH YOUR GUT......

YOU HAVE A VOICE!!!!

NOW USE IT AND TELL ME WHAT TO DO!!

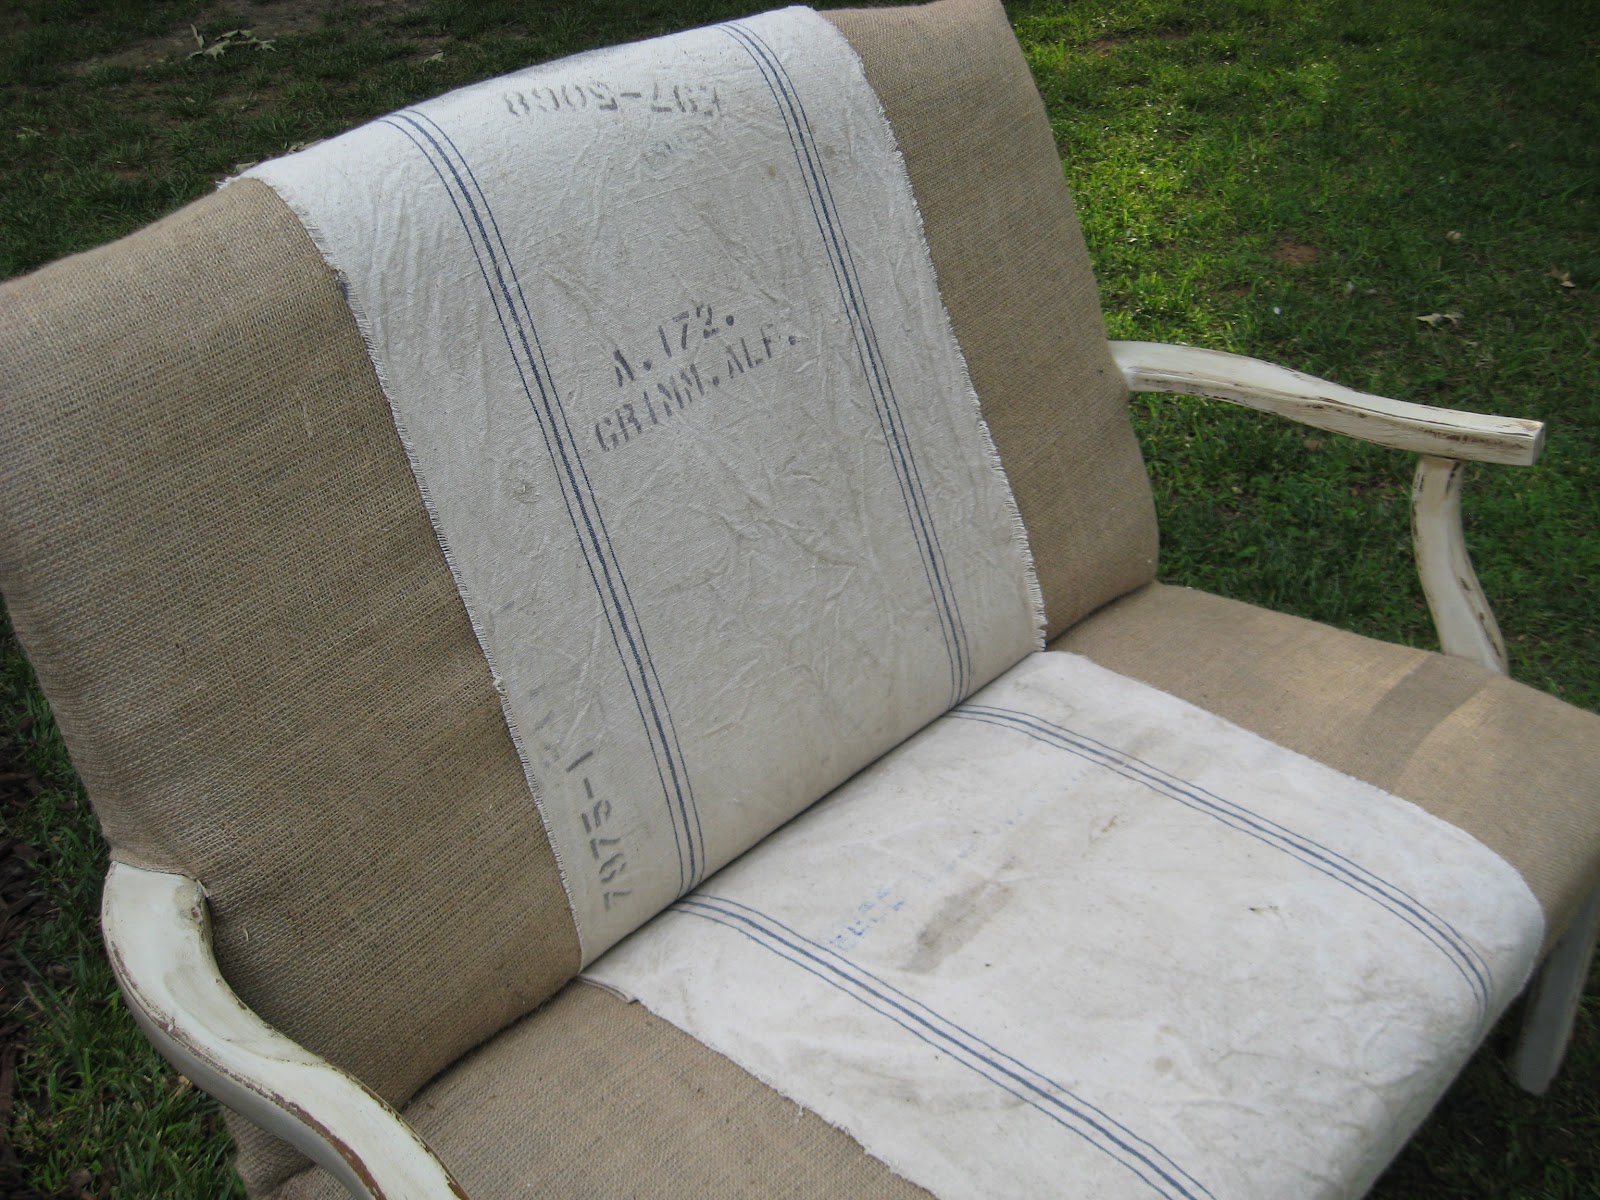
I recently snagged 4 of these beee-utiful chippy white metal chairs at a yard sale.

We're dealing with 1986 sateen decorator fabric

in a stunning "Williamsburg blue" stripe.

{If I had the token goose cookie jar with the big blue bow, these would be adorable!}

Anyway...change is a comin and it's all up to you!

I had two good ideas and now I'm at the corner of Decorators Block and Indecisive Ave.


My first idea was to do each one in a different vintage feedsack....


I love the color combinations of the faded blues, green, reds.....


see what I mean?

cute!


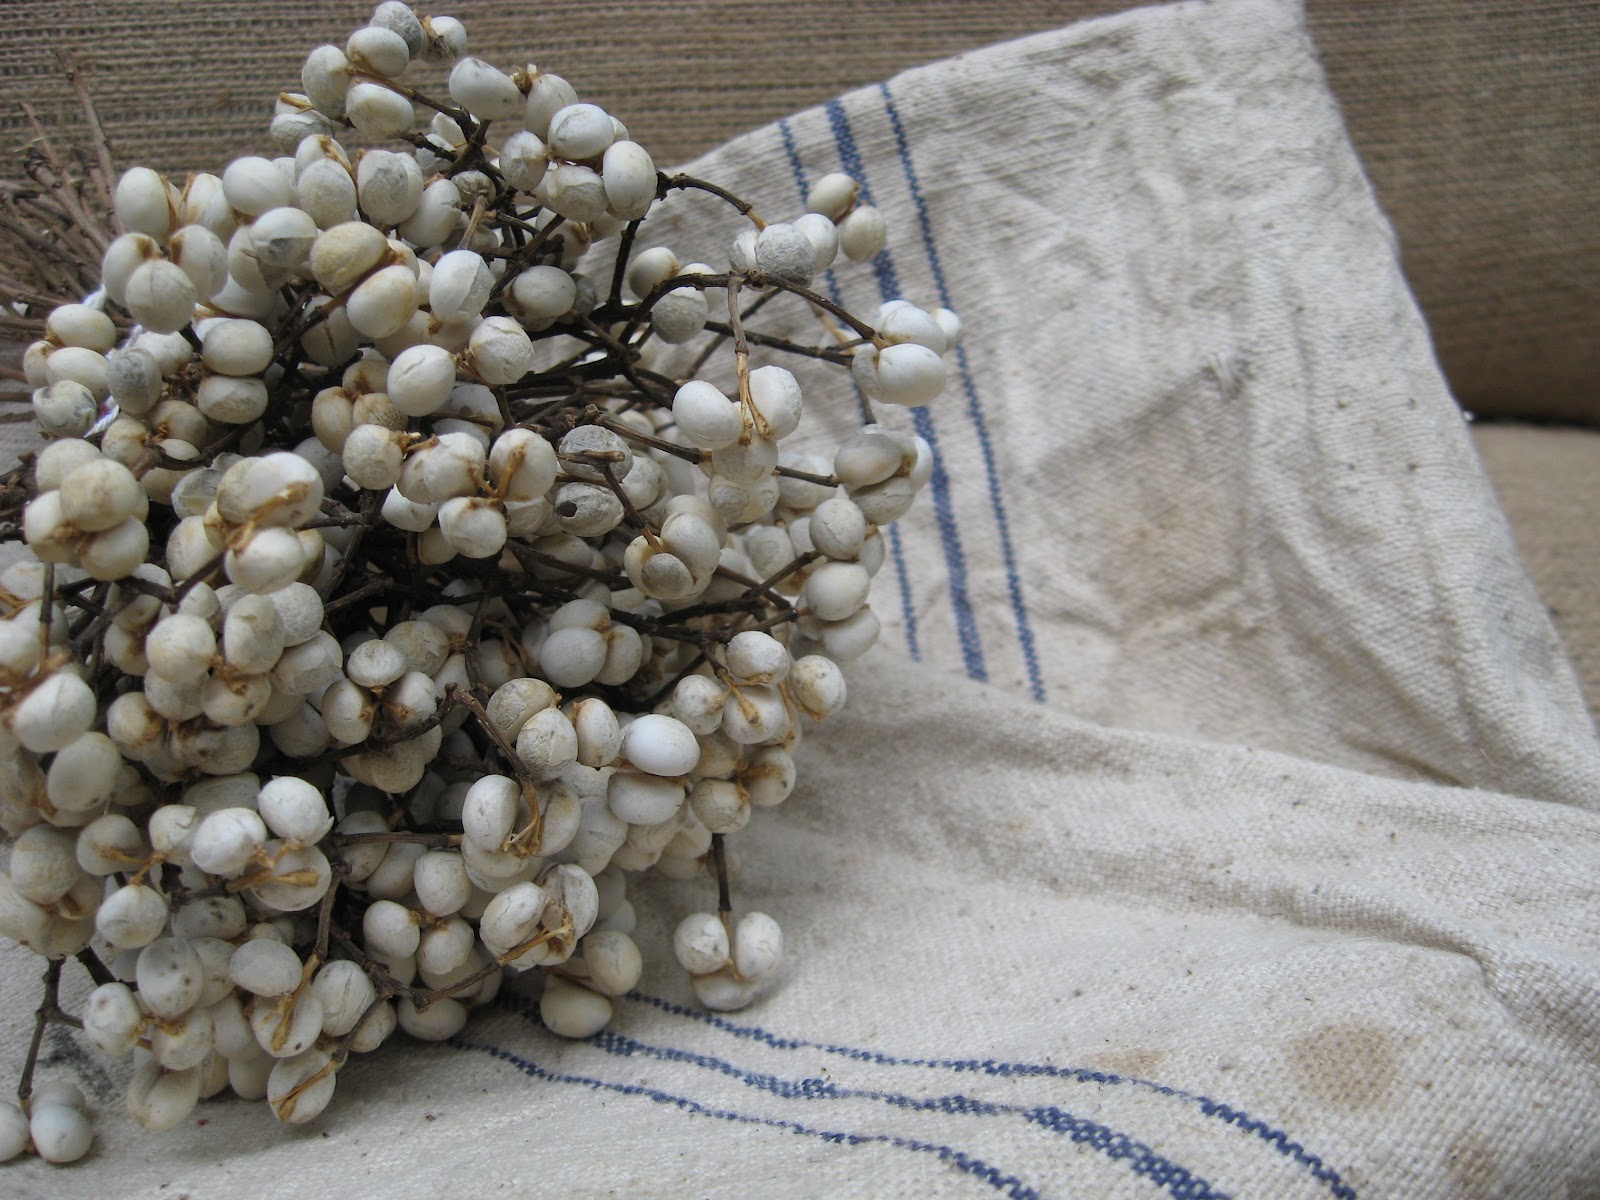
That was all well and good til I remembered I had this fabric stashed away.....


and well now ....you can see why I need help!

The feedsacks make um all one of a kind...truly unique and more versatile for the buyer.

The red is very specific but looks crisp and modern in a country farmhouse way.
PLEASE TELL ME WHAT TO DO!

I DON'T USUALLY BEG FOR COMMENTS BUT THAT HAS BEEN THROW OUT THE WINDOW!!

PLEASE PLEASE PRETTY PLEASE COMMENT AND LET ME HEAR WHAT YOU'RE VOTIN FOR!

FEED SACKS OR RED GINGHAM!!

Thank YOU!!!!! You're all one in a million!

P.S. Thanks to the ladies that left a comment on the post I did this morning. I did what you suggested and it worked!! ((((hugs))))

NOW please VOTE!!

:0)


Friday, March 25, 2011

Updated Old ShopKeeper Aprons!

Good Morning Friends!
It's 6 am here and chilly! Mr. OTM and I are getting ready to head out on a Junk Fest and before we left I had to link up to my girl Jami's AIR YOUR LAUNDRY linky she does every Friday.
Up this week are some cool vintage shop keeper aprons that I picked up last week at an antique mall. Mr. OTM spotted them and thought I'd like um...particurally because they have stains and a great worn feel. He was right! As soon as I saw them I was able to envision what I wanted to do. AND it was easy...thank goodness! My first thought was a transfer....

They started out like this...plain and ordinary...

then I added the vintage blue ticking divided pocket...


and PRESTO CHANGE-O!!
Now they're at the shop. I have 6 all together. I did one for myself that says Olde Tyme Marketplace, then 3 that say Vintage Market and 2 that say Marche aux Fleurs (flower market).
I love me an easy project and these worked out great!
Hop on over to Jami's and see some other great textile goodies to get you inspired.
Have a great day!